
“JunkPunk” is an action packed, punk inspired, junk and wire robotic combat game that focuses on you, a junkyard mechanic. In your spare time, you create robots built to compete in underground combat tournaments. Build your robot to suit your playstyle, and compete in the arena, where robots rip each other apart piece by piece in hack-slash-and-shoot brawl, while you compete for fame and glory. Will you be at the bottom of the bin, or the top of the trash heap?”

Programs Used:
Unity Editor
Probuilder Plugin for Unity
Microsoft Office
Adobe Photoshop
Paint.Net
Time Spent:
Personal Hours: 270
Total Team Hours: 2134
Across 2 Semesters, or about 25 Weeks
Team Size: 12
2 Producers/Managers
3 Designers
3 Programmers
3 Artists
1 Business/Publication Producer

Junkpunk Arena
Junkpunk Arena is a game I worked on with a team of four other students as my Senior Capstone game at Champlain College. I worked on the Level Design as well as the lighting and shaders for the game. We presented our game at the end of the semester at a Greenlight Presentation, and our game was one of eight that was selected to go forwards to next semester. I’m looking forward to continuing to work on the game after the semester ends. I put the full Greenlight presentation video at the bottom of this page. Working with all thirteen members was amazing, and I’m hoping to keep working with them over the summer while I start my job search.

My Process
I started the design for the factory level with a sketch on grid paper to pitch the level concept to my teammates. I wanted the level to be an earlier one, so I kept the design more simple, while still including a number of traps for the player to utilize, or to wind up triggering on themselves.

My next step was to create a digital version so that editing it would be easier as I made changes to the level. I used Paint.NET since I was most familiar with it, and since I didn’t have easy access to Photoshop due to the computer labs being heavily restricted due to the COVID-19 pandemic.
I then created a seven-page Level Design document for my team and artist to know what was going to be required for the level to be completed. I included the digital map, a walk though of each section, the goals, context, and overview of the level, a section for reference images, as well as an asset list. I put a link to the document on my google drive in the button on the right.

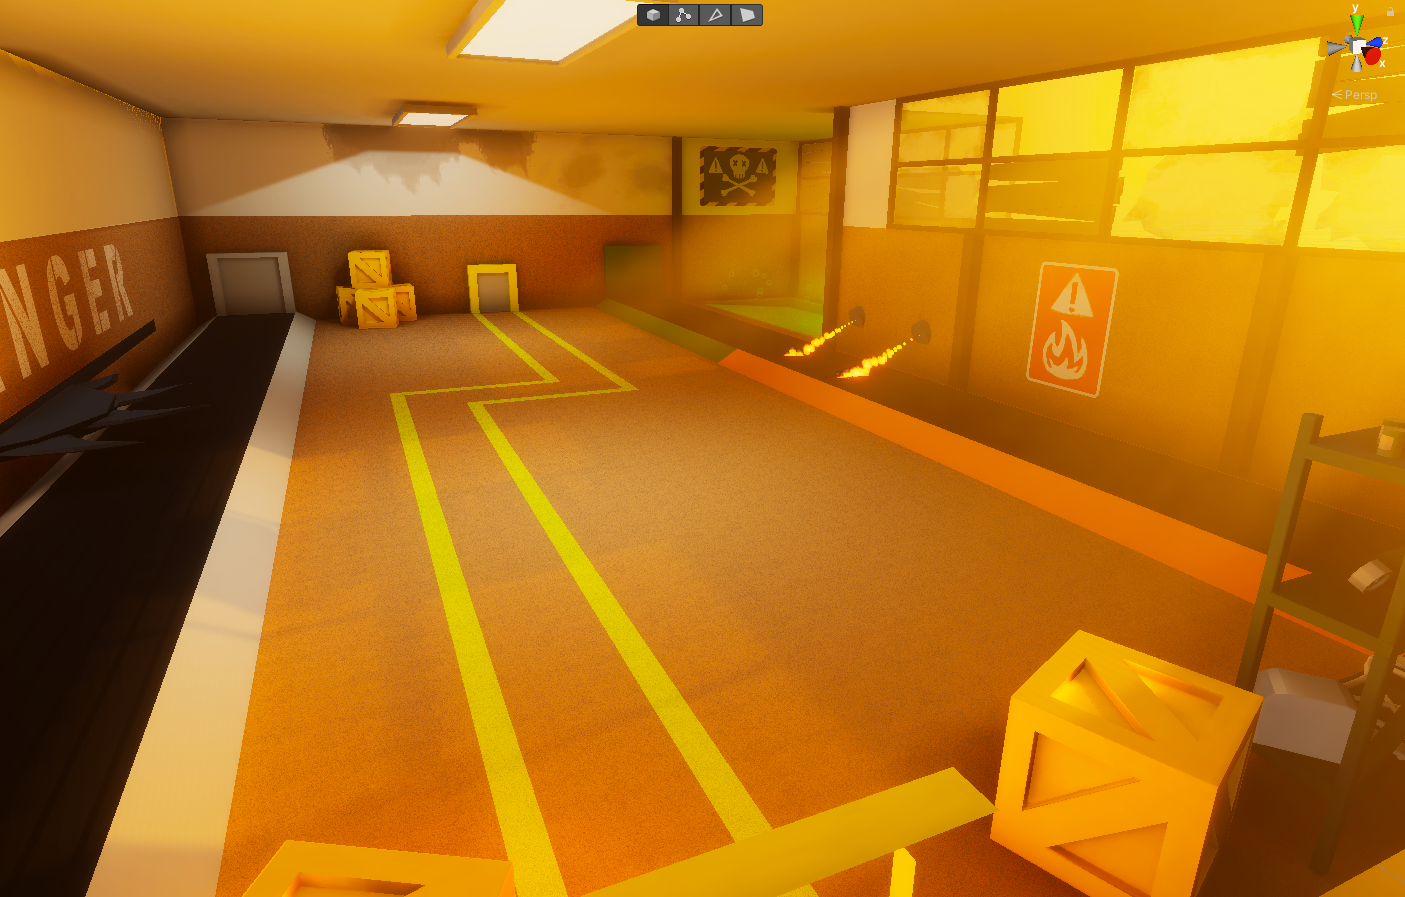
After that I created a basic level greybox for testing. I put this one together using the Probuilder and Progrids plugins for Unity. I then sent this screenshot of the greybox to our artist, so that they could do a draw-over to create a finalized look of the level for me to work on, and her drawings are shown below.


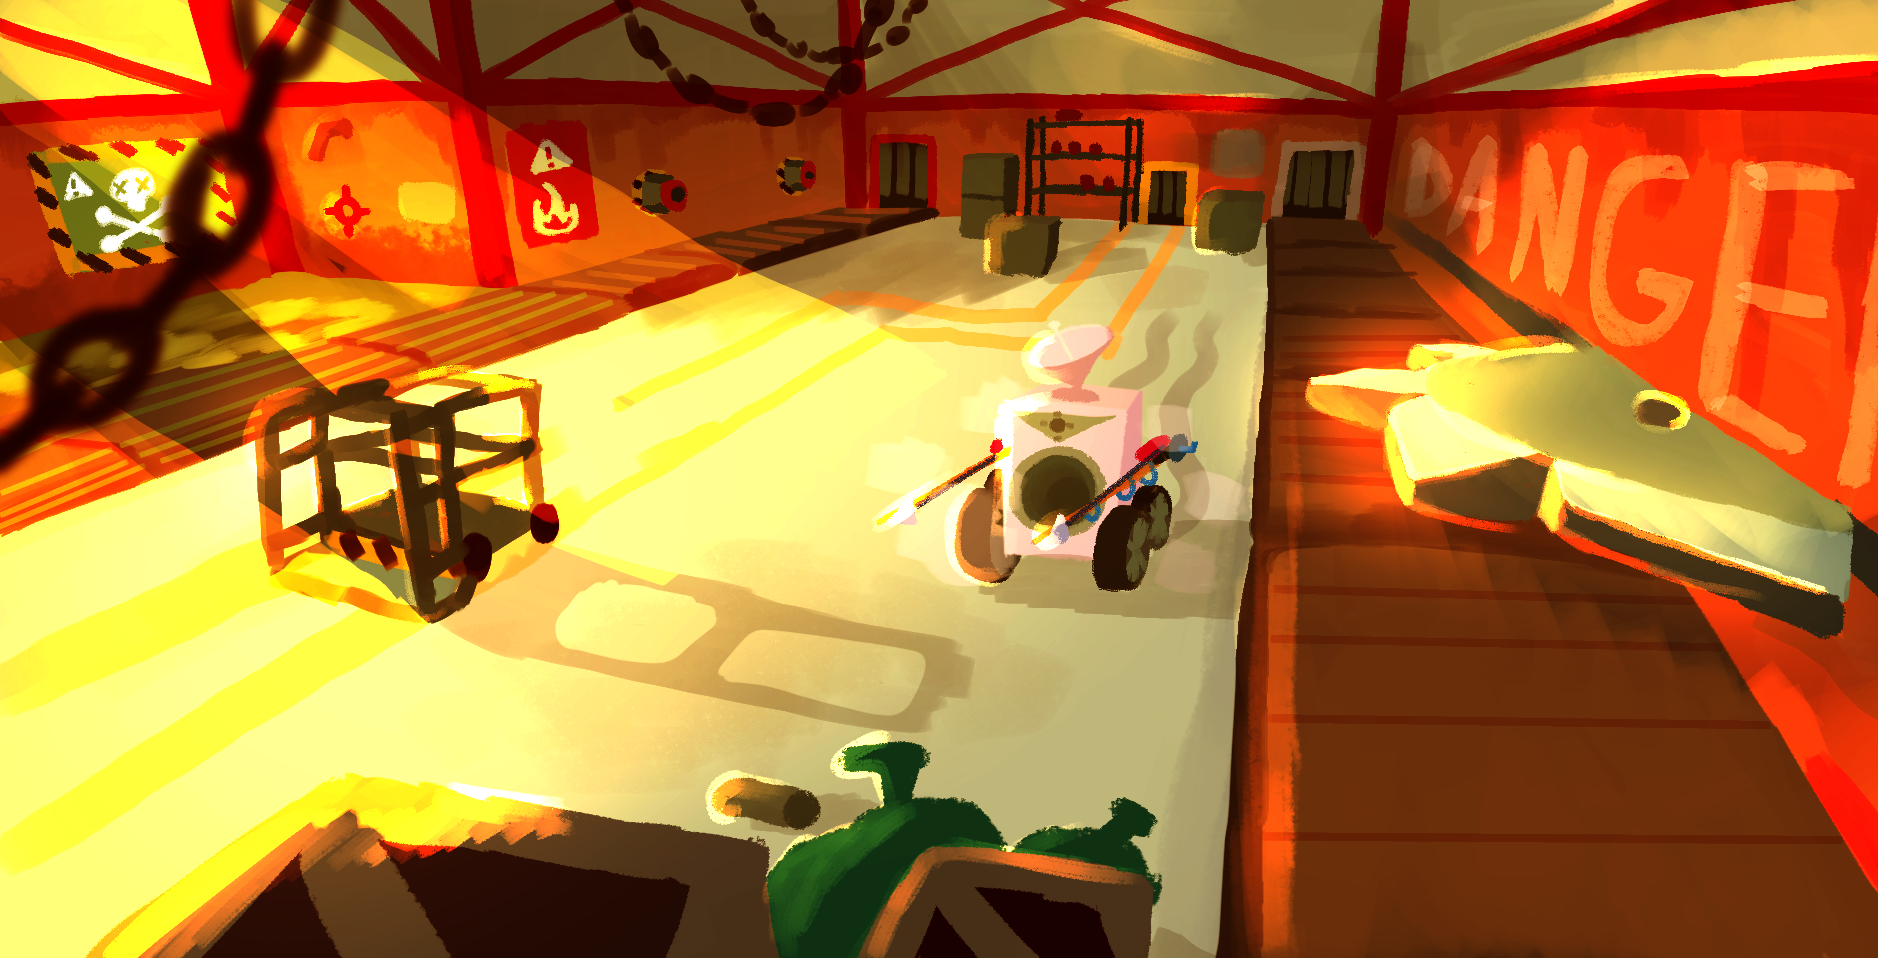
This was the final version of the draw over, and what I eventually based the lighting and prop-placement in the level on.

I then added textures and models to the level as our artist finished them. While I was working on this, I also spent the majority of my time learning and researching how to create lighting and shaders in Unity, and messing with those in a separate copy of the scene.

This was the where I added all of the models, lighting, and shaders. I spent a considerable amount of time tweaking the shaders and lighting to get it to look as close to the concept draw-over of the level that our artist did. I was extremely proud of the final result, especially since it was my first major attempt at lighting, although I planned on giving it another polishing pass later on.
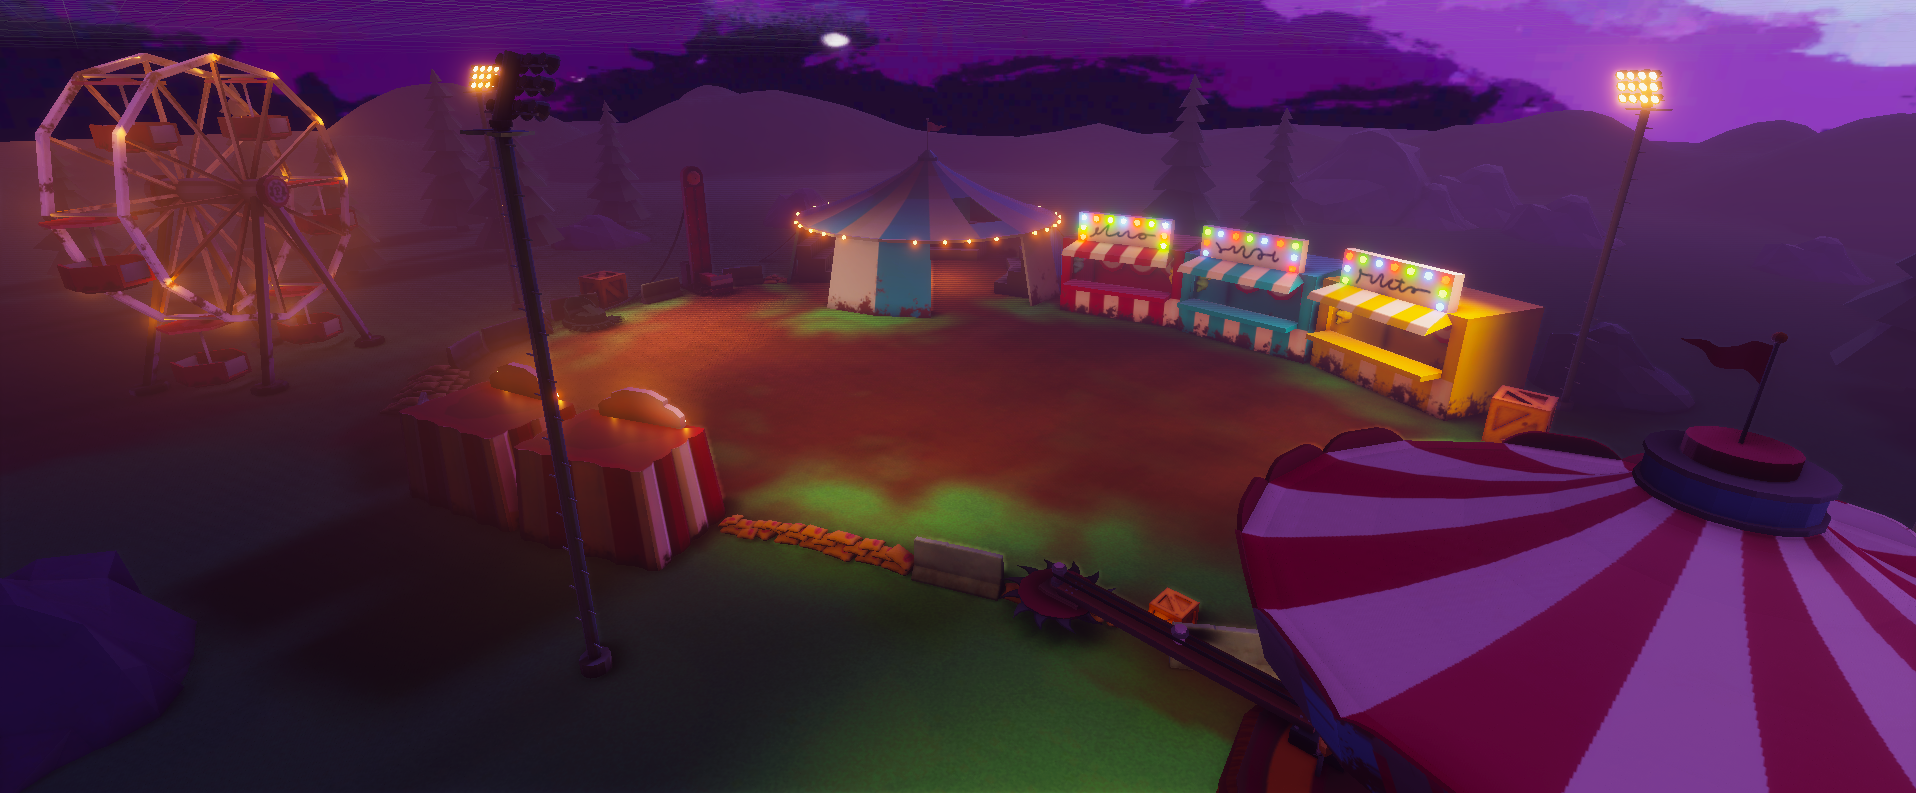
My next task was to work on the carnival level. I followed along the same process to create this level, and my level design doc for this level is linked with a button right below this. Unfortunately, we had to cut the level from production for our senior show, but we plan on implementing it afterwards!
We wanted our UI to be diegetic, so I worked with the UI designer and UI programmer on making a scene and lighting it for our main menu and build scene.

Build Scene

Main Menu Scene (Before final assets)
Finally, I’ve been working on polishing up the Factory Level with new assets, decals, and updated lighting. I’m extremely proud of how it’s turning out!